Wednesday 30 July 2014

Strawberry Shortcake

I orignally made this cake back in May for dessert on our anniversary. I really loved the way the strawberries lent a fantastic moisture to the shortcake mixture, and just the overall freshness of the cake. I love that this cake is just a little bit different. I find it to be somewhere between a shortbread cookie and a proper cake


This was then one of the last recipes I photographed with my old point and shoot camera. At the time I thought the photos were lovely, but then before I got around to posting this lovely wee dessert I got a camera that took AMAZING photos and I just simply couldn't post the recipe anymore!

I made this cake again a few days ago, to make sure I had cake on my birthday. After all, what's a birthday without cake?!


Strawberry Shortcake


Serves 10

250 g (8.8 oz) butter, softened
1 Cup brown sugar
2 eggs
2 tsp vanilla extract
2 1/2 Cups plain flour
1/2 Cup cornflour
2 tsp baking powder
1/4 tsp salt
2 410 g (14 oz) cans of strawberries, drained and chopped (about 250 g fresh would be perfect if they are in season!)

1.  Preheat oven to 180C (350F) and line a 23 cm springform cake tin with baking paper.

2. Cream butter and sugar until light and fluffy. Beat in the eggs 1 at a time and add vanilla.

3. Fold in the flour, cornflour, and salt. Spread 2/3 of the mixture into the base of the prepared cake tin. Spread the chopped strawberries over top.

4. Sprinkle the remaining mixture over the top (I did it kind of like a crumble). Bake for 40-45 minutes, until golden brown on top and set.

5. Cool in the tin. Dust with icing sugar prior to serving. Serve with cream, custard, or ice cream.

Monday 28 July 2014

Seafood Chowder

Being winter, I love creating new winter warmer and comfort food dishes. And there's not much that beats a nice chunky chowder.


 When I was young, whenever we would go out for a meal as a family my Mom would always jump straight to the seafood chowder. It was always her favorite thing to eat. I am always more weary about seafood. I only like it if it's cooked perfectly, always think I don't like most shellfish until I actually eat it, then remember "oh yeah, this is good." Because of these silly little habits I only ordered my first seafood chowder a few months back while Emmet and I were on the road, headed on a weekend trip away. I ordered a seafood chowder from a cafe at a small fishing village. It was delicious. I loved every mouthful of the thick, creamy chowder, packed full of seafood, fresh from the ocean. I knew then that I needed to create my own recipe.


I wanted to keep my recipe to the bare basics. I know a lot of chowders call for diced potato. If you want to add this too then by all means chuck that potato right on in.

Seafood Chowder


Serves 4

1 onion, finely diced
3 cloves garlic, minced
4 Cups fish stock
1/4 Cup plain flour
1 dozen scallops
100 g prawns/shrimp
100 g mussels
300 g Hoki fillets (or any white fleshed fish), diced
1 Cup cream
1 tsp chopped thyme
1 tsp chopped dill

1. Heat a dash of oil or butter in a large saucepan over a medium-high heat. Fry the onion and garlic for about 5 minutes.

2. Add the fish stock and slowly whisk in the flour, making sure the broth is lump free. Bring to a simmer.

3. Add the seafood and cook for about 6 minutes (if the mussels are precooked, add these in the final minute or two).

4. Add the cream, thyme, and dill and stir until the chowder returns to a simmer and is thick. Season with salt and pepper to taste, and a dash of lemon juice if desired.

5. Serve with crusty bread.


Sunday 27 July 2014

Chocolate and Banana Brownies

I have a weakness for anything chocolate based. I just can't get enough. So when we had bananas that needed to be used up of course I needed to incorporate these into a chocolate fix.

Wednesday 23 July 2014

BBQ Steak and Onion Ring Burgers

I've been on a bit of a BBQ sauce kick lately. I hadn't used it much in years. Now I am remembering that it tastes great with almost anything. Especially this steak and onion ring burger.


This was the ultimate man food burger. Emmet was absolutely delighted with his big, thick steak filled burger topped off with onion rings, cheese, and lashings of BBQ sauce.

Steak cooking tip: Always allow your steak to reach room temperature before cooking. Cooking a steak straight from the refrigerator is more likely to cook unevenly. It's also important to rest steak after cooking (cover with aluminum foil) to allow all of the juices to run out from the center of the steak and give a nice, tender, juicy steak.


BBQ Steak and Onion Ring Burgers


Makes 4 burgers

400 g rump steak, seasoned with salt and pepper on each side.
1 - 2 Onion, sliced into rings
1 Egg, lightly beaten
1 Cup milk
1/2 tsp salt
1 tsp baking powder
1/2 Cup plain flour
Oil for frying
BBQ sauce
Lettuce
Cheese
4 x Burger buns

1. Make the onion rings by combining the egg and milk together in a bowl and mixing in salt and baking powder. Coat each piece of onion in flour then coat in the egg batter mixture. Set aside.

2. Heat a dash of oil in a large fry pan over a high heat. Cook steak to your liking (for medium-rare about 3 minutes each side). Set steak aside to rest for about 10 minutes.

3. Heat oil in a small saucepan (or turn on your deep fryer if you have one), once very hot add the onion rings a couple at a time and fry until golden brown, remove onto a plate with a paper towel on it.

4. Slice the steak into strips. Assemble burgers with lettuce, cheese, steak, onion rings, and BBQ sauce.


Tuesday 22 July 2014

Snickers Muffins

Snickers are my favorite chocolate bar. I just love the combination of chocolate, caramel, and peanuts. Snickers are also great in all sorts of baked goodies. Here I've turned them delicious chocolate muffins.


What I loved most about these muffins was the crunch of the chunks of snickers bar within the muffin itself. The caramel from the pieces of snickers bar on top of each muffin also seeped down towards the center of the muffins spreading the chocolate bar deliciousness even further.

Snickers Muffins


Makes 12

2 1/4 Cups plain flour
3/4 Cup sugar
1/4 Cup cocoa powder
1 Tbsp baking powder
1/2 tsp salt
70 g (2.5 oz) butter, melted
1 Cup milk
1 tsp vanilla
2 eggs, lightly beaten
3 Snickers bars, 2 roughly chopped and 1 divided into 12 chunks

1. Preheat the oven to 200C (400F) and grease or line the wholes of a muffin tin.

2. Combine the flour, sugar, cocoa, baking powder and salt in a large bowl. Combine the milk, butter, eggs, and vanilla in another. Pour the wet ingredients into the dry, add the roughly chopped snickers bars and mix until ingredients are just combined.

3. Spoon into the prepared muffin tin and bake for 20 minutes. Half way through cooking, place a piece of the snickers chunks onto the top of each muffin and continue baking.

4. Cool on a wire rack before storing in an airtight container.

Sunday 20 July 2014

Beef Pho

Enjoy the delicious flavors of Vietnamese Beef Pho at home and without any fuss with this simplified version of the classic noodle soup.


Saturday 19 July 2014

Peanut Butter Cheesecake Brownies

I love brownies, peanut butter, and cheesecake. Here's what happens when you throw the three all together!


Thursday 17 July 2014

Baked Bean French Toast Sandwiches

We all know that breakfast is the most important meal of the day. Can you think of a better way to kick start your day than with French Toast stuffed with baked beans, cheese, and bacon?


This baked bean French toast is not only delicious but is made with very little fuss and time, making this recipe perfect for a lazy Sunday brunch.

These easy breakfast sandwiches have been featured on TODAY.com for National Sandwich Day 2014. Check out their post for this and 8 other outrageous sandwiches here.

Baked Bean French Toast


Serves 4

8 Slices bread (I used ciabatta)
3 eggs
1/2 Cup milk
1/4 tsp ground nutmeg
420 g (14 oz) tin of baked beans
4 slices of cheese (I used Edam)
100 g (3.5 oz) Diced ham or bacon

1. Beat the eggs together with the milk and nutmeg.

2. Heat the baked beans slightly in a saucepan or the microwave until just warm. Spread some of the baked beans over 4 of the slices of bread, top with a slice of cheese, diced ham, and finish with the other slices of bread.

3.  Melt a knob of butter in a large fry pan over a medium heat. Dip the sandwiches into the egg mixture, ensuring both sides are well coated.

4. Place the sandwiches into the fry pan and fry for about 4 minutes on each side, or until golden in color and the filling is hot.

Tuesday 15 July 2014

Chocolate Orange Tart

Chocolate and orange are one of my favorite flavor combinations. But by this stage if you have been reading my blog for a while that is probably pretty obvious!


This is the last recipe in my series of "I have more chocolate oranges than I know what to do with!" posts. This tart was really easy to make, has minimal ingredients, lasts well in the fridge, and it D-E-L-I-C-I-O-U-S!!

Chocolate Orange Tart


Serves 8-10

Pastry:

1 1/2 Cups plain flour
125 g  (4.4 oz) chilled chopped butter
1/3 Cup caster (superfine) sugar
1 egg yolk
1 Tbsp chilled water

(Store brought sweet shortcrust pastry is perfectly okay!)

Tart Filling:

1 1/4 Cup cream
1/2 Cup skim milk
200 g (7 oz) Terry's chocolate orange (or orange essence + milk chocolate), chopped
1/4 Cup brown sugar
3 eggs, lightly whisked

1. Prepare the pastry by combining the flour, butter, and sugar together in a food processor. Add the egg yolk and water and process until it comes together. Tip out onto a clean surface, knead a couple of times. Wrap in cling film and chill for at least 30 minutes.

2. Combine the cream, milk, chocolate, and sugar together in a medium saucepan over a medium heat. Stir until smooth. Remove from the heat and set aside to cool until just warm.

3. Add the eggs to the chocolate mixture and mix well.

4. Preheat the oven to 180C (350F). Roll out the pastry and press into a tart tin. Blind bake for 10 minutes. Allow to cool slightly.

5. Pour the prepared filling into the pastry case. Bake at 180C (350F) for 30 minutes.

6. Serve the tart chilled or at room temperature.

This post can also be seen on nzgirl bloggers club: http://www.bloggersclub.com/nzg_cpt_recipes/chocolate-orange-tart/

Monday 14 July 2014

Mini Potato Top Pies

Everyone loves a good pie, not only are they delicious but they are the perfect winter warmer for both lunch and dinner. These mini beef pies with a potato top are easy to put together and taste as great as anything you would find in your favorite bakery.


Instead of making one big pie, I used a 6 hole giant muffin pan to create these little one serve pies, using my icing icing tube to pipe on the potato. I was a bit paranoid about whether this would work or not. I spent a while making sure my potato was super well mashed but even so I was still scared that the potato would get stuck in the tube tip. Turns out that this wasn't even a slight problem, thankfully it worked beautifully!

This recipe is a good way to sneak those extra veggies onto the kids' plates too!


Mini Potato Top Pies


Makes 6

600 g (21 oz) ground beef
1 onion, finely diced
2 cloves garlic, crushed
1 large carrot, peeled and cubed
2 Tbsp tomato paste
1 Tbsp Worcestershire sauce
1 Cup beef stock
3 Sheets of reduced fat savory short crust pastry
Mashed potato (I used 4 large potatoes)

1. Heat a dash of oil in a large fry pan. Fry the onion and the garlic for a couple of minutes. Add the beef and continue to cook until the beef is browned.

2. Add the carrot, tomato paste, Worcestershire sauce, and beef stock. Bring to a simmer and simmer gently for 30 minutes, until the sauce is reduced and thick.

3. Preheat the oven to 180C (350F). Grease a Giant/Texas muffin pan and line the base and side of each hole with pastry. I rolled out the store-brought pastry sheets a bit, cut in half and used half a sheet per hole. (I also blind baked the pastry for 10 minutes, but this is up to you!)

4. Spoon in the beef mixture, top with potato and bake for 30 minutes, until the top of the potato is golden and the pastry cooked.

Sunday 13 July 2014

Caramel Oat Slice

Emmet and I were going away for the weekend a few weeks ago, leaving our dog behind with our housemates. Ella can be a bit of a handful so I wanted to leave them with something to sweeten them up in case she acted out.


Caramel and rolled oats are a great combinations. This turned out to be reminiscent of both a caramel slice and a crumble dessert.


Caramel Oat Slice


Makes 18 pieces

175 g (6 oz) butter, softened
1/2 Cup sugar
1 tsp vanilla extract
2 Cups flour
1 tsp baking powder
3/4 Cup rolled oats
400 g (14 oz) tin of caramel

1. Preheat the oven to 180C (350F) and line a slice pan with baking paper.

2. Cream the butter and sugar until pale and fluffy. Add the vanilla and mix well.

3. Sift in the flour and baking powder. Mix well to combine. Press 3/4 of the mixture into the base of the prepared pan. Spread the caramel over the top. Stir the oats into the remaining base mixture and crumble over the top of the caramel.

4. Bake for 20 minutes, until the top is golden. Cool in the pan before cutting into slices.

Wednesday 9 July 2014

Slow Cooked Lamb Shanks

Slow cooked lamb shanks are just delicious, the meat falls from the bone and almost melts in your mouth. This is great comfort food on those cold winter nights. If you're in the middle of summer, recipes like this are also good for avoiding heating up your kitchen.


The sauce I used here is packed full of flavor and has a delightful taste and texture. We absolutely loved this dish and we will definitely be making it again very soon.


Slow Cooked Lamb Shanks


Serves 4

4 Lamb Shanks/Knuckles
1 onion, finely diced
4 cloves garlic, crushed
140 g tub (5 oz) tomato paste
1 Cup red wine
1 Cup lamb stock
400 g (14 oz) tin of diced tomatoes
1 large carrot, diced
1 sprig of rosemary, removed from stalk and leaves finely chopped
1 tsp salt
ground black pepper to taste


1. Heat a dash of oil in a large fry pan over a high heat. Sear the lamb shanks briefly, one at a time.

2. Place all ingredients in a slow cooker/crock pot and cook on low for eight hours.

3. Gently remove the lamb shanks into a dish and cover with foil, set aside. Pour the sauce into a large fry pan or sauce pan and simmer for about 20 minutes, until reduced.

4. Serve over mashed potatoes.

Tuesday 8 July 2014

Chocolate and Nut Scrolls

These chocolate and nut scrolls were one of my first ever recipes.  I've updated the post for you with 1000 x better photos to do this recipe the justice it deserves.


I've made these scrolls countless times now, to take along to lunches, friends houses and work. I always get such fantastic feedback. Everyone loves them.

These scrolls are really straightforward to make but they do take a bit of time, as with all recipes involving yeast. They are absolutely worth the wait, I promise!


Chocolate and Nut Scrolls


Makes about 20

Dough

1 Cup full fat milk
1/2 Cup + 2 tsp Sugar
2 1/2 tsp yeast granules
4 - 5 Cups plain flour
175 g (6 oz) butter, melted
2 eggs, lightly beaten
1 tsp vanilla essence
1/4 of a 250 g block of milk chocolate*, grated

Filling

Nutella, or other hazelnut spread (about 1/2 jar)
70 g (2.5 oz) sliced almonds
70 g (2.5 oz) chopped macadamia nuts
1/2 block of milk chocolate* (125 g), smashed or chopped into small chunks

Topping

2 Tbsp melted butter
1 egg, lightly beaten
1/4 Cup milk

1. Prepare the dough by heating the milk and 2 tsp sugar in a saucepan over a low to medium heat until just hot to the touch, bubbles will start to form around the outer edges of the saucepan. Don't boil as the yeast will die when you add it.

2. Remove from the heat and gently whisk in the yeast. Set aside for about 10 minutes to activate the yeast. When the yeast is activated it will look frothy.

3.  Sift 4 cups of flour into a large bowl.  Add the milk/yeast mixture, sugar, vanilla, melted butter, grated chocolate, and eggs. Stir with a wooden spoon to combine. You will know at this point whether you need to add the extra flour or not, if the dough is very wet, add a little more flour.

4. Tip dough onto a well floured surface and knead a few times, put back into the bowl, cover with cling film and set the bowl in a warm spot for 30 minutes to an hour, until the dough has doubled in size.

5. Preheat the oven to 190°C.

6. Once the dough has risen, punch it a couple of times to get rid of the air and knead it a few times again. Roll it out on a well floured surface into a rectangle about 5 mm thick.

7. Spread the Nutella over the dough right out to the edges, sprinkle with the chopped up chocolate, almonds, and macadamia nuts.  

8. Roll up into a log, lengthways, and cut into about 3 cm thick chunks. Arrange in a roasting dish lined with baking paper and leave in a warm spot again for about 20 minutes to rise again.

9. Brush the top with combined lightly beaten egg, milk, and melted butter and bake for about 20 minutes. Once removed from the oven, leave in the oven trays to cool. 


* I used a milk chocolate coconut block. If you can't find a good quality coconut chocolate but you still want the coconut in your scrolls just use your favorite milk chocolate and add about 1 Tbsp of desiccated coconut to the scrolls when spreading with the chocolate and nuts.


Monday 7 July 2014

Spicy Beef and Rice

We all love to have our simple, quick, and tasty one pan thirty minute meals during the week. This spicy beef and rice is my favorite, on the table in less than half an hour, with minimal mess.

Thursday 3 July 2014

Peanut Butter and Chocolate Muffins

I've been on a bit of a peanut butter kick lately, about half of what I have been baking contains peanut butter. But whose going to complain about that?


These peanut butter and chocolate chip muffins were amazing. But why wouldn't they be? Peanut butter and chocolate is a match made in heaven.

I love using brown sugar in muffins like these as it gives a nice caramelized flavor that you can't get with normal white sugar.

I make muffins every weekend for my honey to take to work for his breakfast during the week, thinking of new muffin ideas can really stretch my imagination sometimes so if you have an idea that you would like to see a recipe for I will happily make it for you so send your ideas my way!


Peanut Butter and Chocolate Muffins


Makes 12

40 g (1.4 oz, 3 Tbsp) butter
3/4 cup peanut butter
2 eggs, lightly beaten
1/2 cup brown sugar
1/4 cup white sugar
3/4 cup skim milk
2 cups plain flour
1 tsp baking powder
1/4 tsp baking soda
1/4 tsp salt
3/4 cup chocolate chips

1. Preheat oven to 180C ( 350F) and grease or line the holes of a muffin tin.

2. Mix the butter, peanut butter, sugars, and eggs together in a bowl. Add the milk.

3. Mix the flour, baking powder, baking soda, salt, and chocolate chips. Add to the peanut butter mixture and mix until everything is just combined.

4. Spoon into the prepared muffin tin and bake for 20 minutes, until a skewer inserted into the center of the muffins comes out clean. Cool in the tin for about 10 minutes before transferring to a wire rack.

5. When cooled, drizzle with melted chocolate (optional) for that little something extra.

6. Store in an airtight container at room temperature. They last a good few days!

Wednesday 2 July 2014

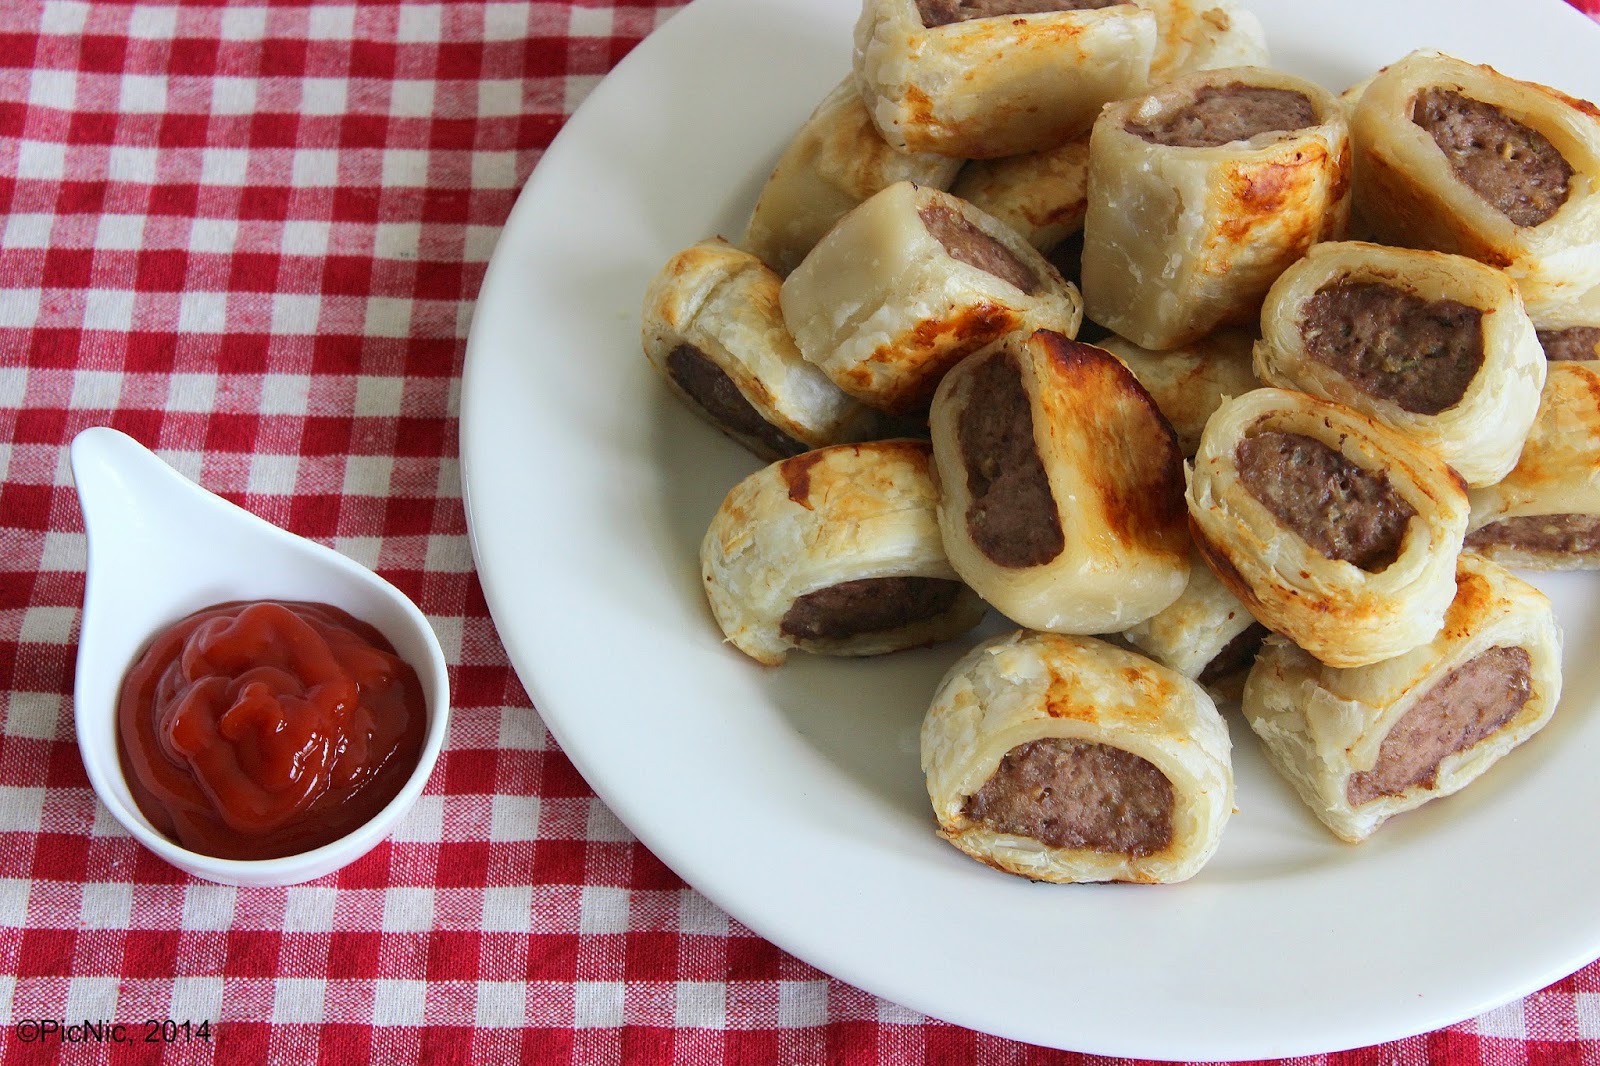
Beef Sausage Rolls

Sausage rolls make a simple lunch, dinner, or kid's birthday party  finger food. Putting them together is quick and easy and of course making your own is a much healthier alternative to buying the frozen rolls in a supermarket.