Wednesday 25 December 2013

Pavlova

I made a pavlova for Christmas dessert this year. This is such a typical New Zealand Christmas dessert so I thought it would be good to share the recipe with all my non-NZ readers. This recipe turned out just lovely. The outside was a nice crisp meringue while the inside was light and fluffy. They key to making a great pavlova (that also doesn't collapse!) is the make sure to not remove it from the oven until it is cool. Don't be tempted to open the oven door for a peak, just leave it be. Another pavlova plus is that it can be made a day or two ahead and then stored in an airtight container. I made mine a day ahead, saved lots of time!


Pavlova


Serves 8 - 10

6 Egg whites, room temperature, not too fresh works well for beating
1/4 tsp salt
1 1/2 Cup caster sugar
1 tsp white vinegar
2 tsp cornflour

To top:

1/2 Cup cream, whipped
Mixed berries/fruits (I used strawberry, raspberry, and kiwi)

1. Preheat oven to 180°C and line a baking tray with non-stick baking paper.

2. In a clean, dry bowl, beat the egg whites and salt until stiff. While the beater is still running, slowly add the sugar. Continue to beat at a high speed for about ten minutes, until the mixture is very thick and stiff and does not fall off the beaters when removed from the mixture.

3. Fold in the vinegar and cornflour.

4. Transfer the mixture to the prepared tray with a large spoon, forming a big circle. Don't flatten out the top, just leave it as a dome so that if it does collapse it will be less likely to form a big crater.

5. Bake at 180°C for 5 minutes, reduce heat to 130°C and continue to bake for 60 minutes. Turn off the oven and leave to cool (leave it in the oven for another hour or so).

6. Before serving, spread over the whipped cream and decorate with berries.

Monday 23 December 2013

Mushroom Macaroni

I briefly saw a recipe a few weeks ago for a mushroom mac and cheese and thought it sounded great. As I am currently on holiday I have been looking for quick and easy dinners that are still tasty enough to keep everyone happy. I thought I would try out my own version of a mushroom mac and cheese, so here it is! (Since I think I have been over doing the sweets a bit lately).


 Mushroom Macaroni


Serves 4-6

400 g macaroni
2 Cloves garlic, finely diced
250 g lite cream cheese
1/2 Cup cream
125 g Camembert, white part removed.
100 g Edam, grated (plus extra for sprinkling)
400 g mushrooms (I used white button, Portobello, and shiitake)
1 tsp (or thereabouts) dried chilli flakes
Ground black pepper, to taste
1/2 Cup breadcrumbs

1. Cook the macaroni, according to the package instructions.

2. Dice the mushrooms. Whip the cream cheese until light, add chilli flakes and ground black pepper.

3. Heat a small amount of vegetable or olive oil in a large saucepan, add the mushrooms and garlic and fry for a couple of minutes. Add the cream cheese, cream, camembert, and edam. Cook over a medium heat until the cheese has melted.

4. Stir through the macaroni and coat well. Pour into a casserole/oven proof dish. Coat with breadcrumbs and edam cheese and bake until golden (about 15 minutes).


Saturday 21 December 2013

Malteser Cheesecake

It seems as though my blog has been taken over by cheesecakes recently. Luckily cheesecakes are great so I don't think it's too much of an issue, but I promise to do something different next! I wasn't going to post this one, made it at the request of my boyfriend, but then he said I should post it as it was delicious.

Malteser Cheesecake


Serves 10

250 g Vanilla bisuits
100 g butter, softened
500 g cream cheese
2 tsp vanilla essence
1/4 Cup caster sugar
155 g pack Maltesers, plus extra for topping
1 Cup cream, whipped

1. Make the base by processing the biscuits to a fine crumb in a food processor. Add the butter and process again. Press into the base and up the sides of a 20 cm spingform tin lined with baking paper, or greased.

2.  Add the cream cheese*, sugar, and vanilla to a large bowl and beat with an electric beater until light and creamy.

3. Wipe out the food processor, add the Maltesers and process until broken, enough so that the chunks aren't too large, but it's not just a powder. Fold into the cream cheese mixture.

4.  Fold the whipped cream into the cream cheese mixture and spread over the base, cover and chill until set. Before serving, cut a few Maltesers and half and sprinkle over the top.

*I wanted to make mine a bit lighter so I used half regular cream cheese and half lite cream cheese. It still tastes exactly the same as if you used all normal cream cheese but the consistency will not be quite as firm.


Sunday 8 December 2013

Vanilla Chocolate Chip Cupcakes with Candy Cane Frosting

I am starting to get pretty excited about Christmas now. Only a week and a half left before we head off on holiday too! In my Christmas excitement I came up with these Christmas themed cupcakes.

On a side note, I think my photography is starting to improve! I have been taking close note of the photography on other food blogs I follow. Think I might have to go back and re-photograph some of my earlier monstrosities.


Vanilla Chocolate Chip Cupcakes with Candy Cane Frosting


Makes 16

Cupcakes:

150 g butter, softened
1 Cup caster sugar
2 eggs
2 tsp vanilla essence
2 1/2 Cups self-raising flour
1 Cup skim milk
1 Cup chocolate chips

Candy Cane Frosting:

5 Candy Canes
100 g butter, softened
1 1/2 Cups icing sugar
2 Tbsp skim milk
Optional: Hershey's kisses to top. 

1. Preheat the oven to 190°C and grease a muffin pan.

2. Beat the butter and sugar until light and creamy. Add the eggs one at a time and beat well after adding each egg.

3. Add the flour, milk and vanilla and mix until combined. Add the chocolate chips and stir them through.

4. Spoon the mixture into the the prepared pan and bake for 20 minutes, or until the cupcakes spring back when gently pressed. 

5. Make the frosting by crushing the candy canes to a powder in a food processor. Add the butter, icing sugar, and milk and process until it is smooth. Once the cupcakes are cool pipe the frosting onto the cupcakes.

I didn't have a piping bag so I just spread mine on with a knife, but it would look a lot more impressive if it was piped on!

Friday 6 December 2013

Lemon Yogurt Cake

As we go on holiday in a couple of weeks and then move house after we are back I want to try and use up lots of my baking stuff (and perishables before holiday!), don't think it would be too fun potentially getting flour all over everything trying to move it all. The motivation for this recipe was that I had a heap of lite Greek yogurt and eggs sitting in the fridge that need to be used up.


I loved how moist and light this cake turned out. Tasted great with strawberries and ice cream too! I think this would also work nicely as cupcakes with a lemon buttercream icing. If you try making cupcakes let me know how it turned out =)


 Lemon Yogurt Cake


Serves 10 - 12

1 Cup caster sugar
Rind of 2 lemons, finely grated
2 eggs
1/3 Cup canola oil
1 tsp vanilla essence
1 Cup fat free yogurt (I used lite Greek)
1 1/2 Cup self raising flour

1. Preheat oven to 190°C.

2. In a large bowl add lemon rind, sugar, eggs, vanilla, and oil and whisk together. Add the yogurt and lemon juice and whisk again.

3. Sift in the flour and mix until just combined.

4. Pour the mixture into a baking paper/greased 21 cm cake tin, ring cake tin, or loaf tin. 

5. Bake for 30 minutes, or until a skewer inserted into the centre comes out clean. Leave to cool in the tin. If desired, dust with icing sugar once cooled. 

I will add the nutritional information when I can be bothered calculating it. But it should be pretty good since there is no butter =)

Wednesday 4 December 2013

Homemade After Dinner Mints

When we were doing the grocery shopping on the weekend we were walking past the chocolate section and my boyfriend said we should get some after eights, I said that sounded good (since they are awesome!) although I could probably make them pretty easily. His response was "you can make after eights?!" To me that sounded like a bit of a challenge. Imaginary challenge accepted. So I got thinking of how to go about it. Here's what I came up with. Nailed it.


As you can see, I had a bit of an issue with not making a major mess when cutting into squares. But once I had a taste I realised that it didn't matter whatsoever, tastes exactly like it should!

After Dinner Mints

Makes 16

250 g 72% cocoa dark chocolate
1 Tbsp vegetable oil
1 1/2 Tbsp milk
220 g icing sugar
2 tsp peppermint essence

1. Line a small baking tray with baking paper.

2. Melt half the chocolate over a double boiler, pour into the tray and spread it evenly over the surface by tilting the tray to get it all covered. Place in the refrigerator until set (about 15 minutes).

3. Make the peppermint filling by sifting the icing sugar into bowl. Stir in the oil and milk and combine well to form a smooth paste.

4. Add the essence. Mix well.

5. Spread the filling thinly over the hardened chocolate. Refrigerate for about 30 minutes, until filling is set.

6. Melt the remaining chocolate. Cool slightly. Pour over the peppermint layer and spread evenly. Refrigerate until set.

7. Cut into small pieces with a knife heated slightly under hot water.

I was impatient and did all the chilling in the freezer. 


Saturday 30 November 2013

Creamy Vanilla Cheesecake

If there is one cheesecake recipe you need in your life, this is it. 


Saturday 23 November 2013

Coconut Passionfruit Cake

Coconut cake is by far my favorite kind of cake, but not only is it hard to come by (unless you make it yourself of course), but recipes for coconut cake usually have an overload of butter and sugar. I wanted to see what happened if I tried to make one without butter and greatly reduced sugar. Once again it was something I was quite nervous about. I was worried about the consistency of the final product. It was a pleasant surprise. It tasted exactly how a good coconut cake should, with hints of passionfruit just because passionfruit is also delicious.


Coconut Passionfruit Cake


Serves 8-12

1/2 Cup Caster sugar
1/2 Cup Stevia
150 g apple sauce
3 medium eggs
2 Cups dessicated coconut
2 Cups self raising flour
1 tsp baking powder
1/2 Cup lite coconut milk (or coconut cream)
1/4 Cup Passionfruit curd

Icing:

30 g butter
2 Tbsp passionfruit curd
1.5 Cups icing sugar
1/2 Tbsp boiling water

1. Beat sugar, stevia and apple sauce in a large bowl until light and slightly creamy. Add in the eggs one at a time and beat well after each addition. Fold in the rest of the dry ingredients.

2. Mix the coconut milk and  passionfruit curd together in a small bowl. Add to the other ingredients and mix well.

3. Pour into a lined 25-28 cm cake tin and bake at 180°C for 30 minutes or until a skewer inserted into the centre comes out clean. Cool in the tin.

4. Once cool, ice by mixing together all of the icing ingredients and spreading over top of the cake.

Nutritional Information:

Calories 158
Carbs     20 g
Fat         8 g
Protein   3 g
Fibre      2 g
Sodium  133 mg

Thursday 21 November 2013

Chocolate Peanut Butter Fudge

Fudge is so easy and so delicious and also a favourite of my man so while I was waiting on some baking to come out of the oven a threw this together. Only took a few minutes, also set rather quickly so I didn't have to wait long at all to test it out but I will admit that I had a taster before it was completely set!

I think it goes without saying that this one isn't on my healthy list. But we can all do with a treat every now and again.

Chocolate Peanut Butter Fudge


Makes about 20 pieces

1/2 Tin (200 g) Lite condensed milk
100 g butter
1 Cup brown sugar
1/2 Cup peanut butter
100 g milk chocolate, chopped

1. Line a 20 cm pan with baking paper.

2. Place condensed milk, butter, and brown sugar in a saucepan over a low heat and cook for about 10 minutes, until the mixture starts to bubble. Stir approximately every 2 minutes.

3. Add chocolate and peanut butter and stir until smooth and well combined.

4. Pour into the pan and chill until set, cut into squares.

Tuesday 12 November 2013

Stuffed Mushrooms

When I was trying to decide what to make for dinner tonight I just had a complete mind blank. I couldn't think of anything. I broke it down and thought "OK, my boyfriend loves mushrooms let's make something with mushrooms as the main ingredient" so I wrote out a recipe for stuffed mushrooms, something I have never made before so I really didn't have a clue what I was doing.

I wanted to make them both healthy and filling so I included tomatoes and wholegrain rice as the bulk of the filling . I used some chorizo in the filling as well but these could easily be made vegetarian by omitting the chorizo or replacing it with something meat-free.

So from now on, I will try my hardest to call capsicum red pepper, because apparently capsicum is a made-up word if you aren't from NZ. Haha! =)

Stuffed Mushrooms


Serves 4

1 Chorizo, chopped
1 onion, finely diced
4 cloves garlic, finely diced
1 red chilli, deseeded and finely chopped
1 red pepper, diced
400 g tin chopped tomatoes
1 250 g packet wholegrain 2 minute rice
8 large mushrooms (e.g. portobello)
1/4 cup breadcrumbs
1/4 cup grated parmesan or mozzarella
olive oil
salt and pepper to season

1. Preheat oven to 220°C. Heat a dash of olive oil in a fry pan over medium heat. 

2. Cook rice according to packet directions. Add the onion and garlic to the fry pan and fry for about 3 minutes. Add chorizo, chilli, and red pepper and fry for a couple more minutes.

3. Remove from the heat and stir through rice and tomatoes. Trim the stalks from the mushrooms, dice them up and add them to the filling too. Season with salt and pepper.

4. Place the mushrooms on a lined baking tray and fill with the mixture. Top with breadcrumbs and cheese and bake until mushrooms are tender and cheese is melted, about 15 minutes. 

Nutritional Information

Calories 313
Carbs    45 g
Fat        10 g
Protein  16 g
Fibre     5 g
Sodium  580 mg

Saturday 9 November 2013

White Chocolate, Raspberry and Macadamia Blondies

I have never made blondies before, or really tasted them, but I have been seeing them in cafes a lot lately and thought they looked pretty good and maybe I should give it a go but make it a bit healthier.

I couldn't really make up my mind what to put in them but then my friend asked if I could teach her to bake something. Of course I was more than up for that so I asked her what she wanted to make and she said something with raspberries (we are going to make raspberry white chocolate muffins). I then needed to pick up some raspberries from the store I thought I would add some to this recipe too.

I was a little concerned when I got them out of the oven as they seemed a little dense, but after tasting one I realised that they actually had a lovely, soft texture.


White Chocolate, Raspberry and Macadamia Blondies


Makes 18 pieces

100 g white chocolate, broken up into small pieces
1 Tbsp vanilla essence
1/2 Cup apple sauce
1 1/4 Cup plain flour
2 eggs
1/4 Cup stevia
1/2 Cup white chocolate drops
3/4 Cup raspberries
1/2 Cup macadamia nuts

1. Preheat oven to 180°C, line a brownie pan with baking paper.

2. Melt white chocolate over a double boiler, stir in the apple sauce and set aside to cool.

3. Beat eggs, vanilla, and stevia until foamy. Fold in the white chocolate/apple sauce mixture and then fold in the choc chips, raspberries, and macadamia. Make sure you do this gently so that the raspberries don't get crushed up.

4. Spread mixture into the pan and bake for 25 minutes, or until a skewer inserted into the middle comes out clean. Cool in the pan before cutting into pieces.

Nutritional Information:

Calories 148
Carbs    17 g
Fat        8 g
Protein  3 g
Fibre     1 g
Sodium  22 mg 

Tuesday 5 November 2013

Free Range Foodies Dinner Party

 When I was scrolling through Facebook a while ago I saw a post on Annabel Langbiens page: "I'm putting together a panel of keen cooks – the Free Range Foodies – to give me feedback and help spread the word about my new recipes, products and ideas. If you love to cook for others and share your foodie discoveries through social media, simply sign up below"

I thought this sounded like me so filled out the application form, then a few weeks later I got an email saying that I had been selected, then the following week I received a preview copy of the Summer Annual Cookbook in the post. It was all very exciting! And I then had a lot of fun selecting a menu made up of recipes from my lovely new cookbook.

Typical of me, I planned a very ambitious menu, with probably far too many different things in each course but hey, I do like a good challenge, and I absolutely did not want any of my guests going hungry!

 I hosted my Free Range Foodies dinner party for 14 (myself included, which caused me a great deal of panic as I had never cooked for that large a number before!) on Sunday. I spent Saturday morning shopping for as many of the ingredients that I could get my hands on at the Otago Farmers Market, as well as picking up some beautiful pink peonies. The Poultry stall guy had a very shocked look on his face when I asked for around 16 chicken thighs.

Saturdays main challenge was tracking down red cabbage. I never knew it could be so difficult to find in season produce! Thankfully, a trip a different supermarket on Sunday had some in stock. Phew.
 Due to my overambitious menu, I spent all of Sunday in the kitchen. Which is actually fine by me, as I love to be in there creating deliciousness! Thankfully I had a super helpful boyfriend helping me out. However, I did almost have a meltdown at about 3 pm when I went into the freezer to get out some puff pastry for one of the starters only to find it in a million tiny wee pieces, so it was off on another walk to the supermarket.

In the end, everything came together just fine before the guests started to arrive. Luckily for me, I had super awesome flatmates to help arrange the table and chairs before everyone arrived.


So.. I can assume that you are sitting there wondering what was on the menu??
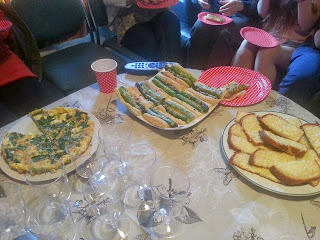
Starters:

Asparagus tarts
Spinach, Pea, Mint and Feat Frittata (Pictured)
Cheesy garlic bread (wasn't from any recipe, just threw it together to use up left over Farmers Market Brioche).


Mains:

Coconut Slaw
Spicy corn rice
Jerk Chicken
Steak with Moroccan spice rub
Sweet corn and pesto polenta

All of these dishes turned out absolutely fantastic. I had never cooked polenta before, but as one of my guests was vegetarian I thought I should put just as much effort into a vegetarian dish as I was the meat dishes. The first sentence in the recipe for the polenta was "cook polenta following the package instructions." The package just said "SunValley Pole
nta". Google search. Looked at four pages on how to cook polenta and got four completely different methods.. oh dear. I just guessed in the end and it turned out fine. I even got lots of comments on how tasty it was.                                                                                                                                                          


Left: Slow cooked steak with Moroccan Spice rub, just the right degree of spiciness. Full of flavour, delicious! And I still have lots of the spice rub left over, looking forward to getting creative with it!


Top left: Spicy corn and rice
Top right: Polenta. Well, what's left of it anyway! It disappeared very quickly.
Bottom centre: Coconut slaw. Green and red cabbage, carrot, toasted coconut with a zesty dressing.

All three of these got fantastic comments =)


The only picture that was taken of the chicken before it was all eaten was a surprise photo of me getting it out of the oven. Of all the main course dishes I think this was my favorite. The chicken was beautifully tender and moist, and the jerk sauce had a perfect balance between the sweetness of orange and the spiciness of the different spices.


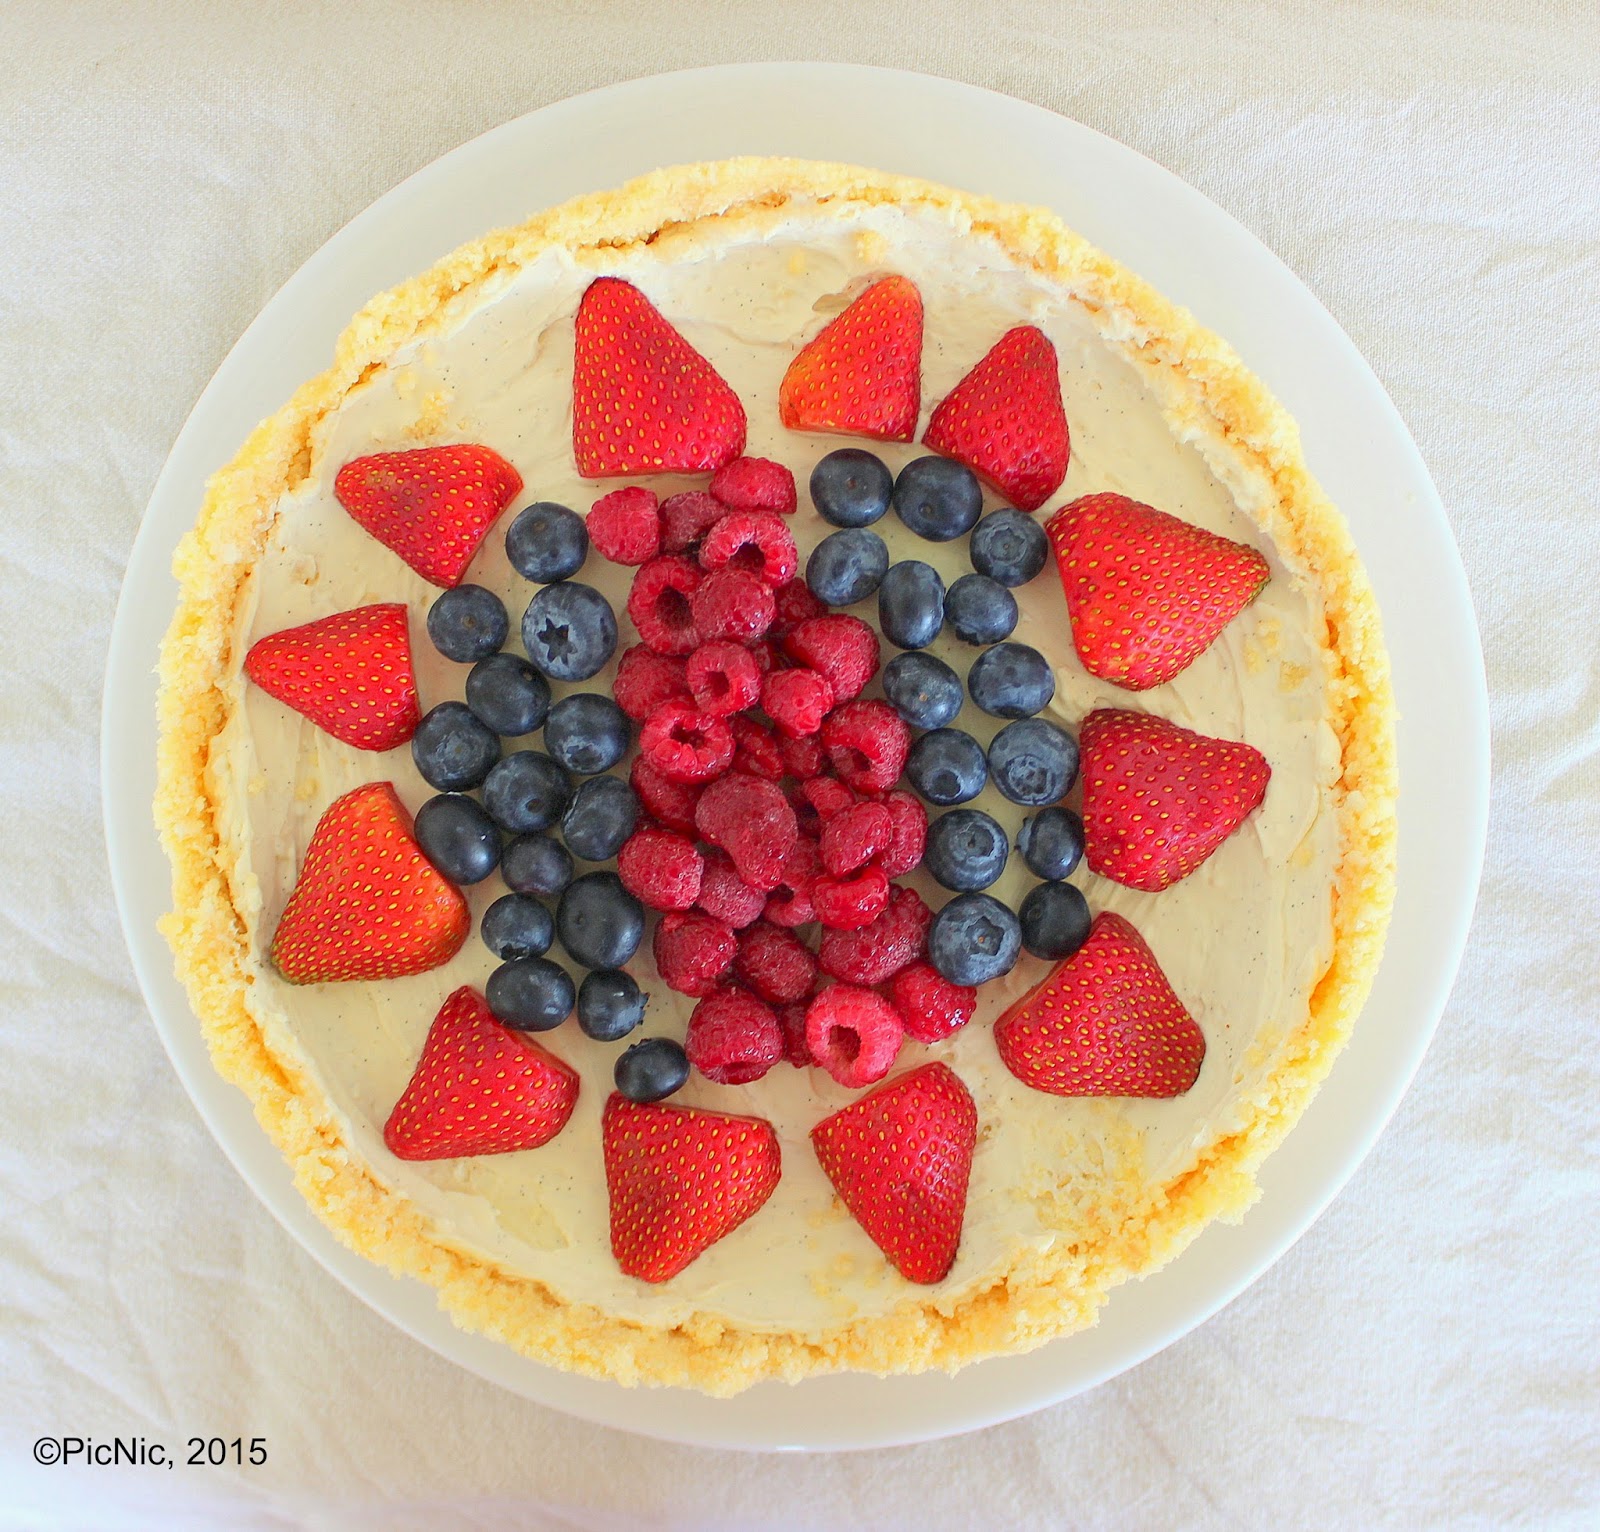
If you have been following my blog you would have picked up by now that desserts are a definite favourite of mine. I often struggle to make sure that I keep a balance between baking/desserts and main meals. So of course this dinner was no exception. I made far more dessert than would ever be necessary. Unfortunately, dessert mostly got eaten before anyone remembered to take photos. But we did get one!

Dessert:

Chocolate meringue cake (pictured)
Raspberry ripple ambrosia
Three ingrediant chocolate moouse
Chocolate dipped strawberries (just because I like them..)

I loved every one of these (of course). By this point everyone had already had far too much to eat but everyone still managed to find enough room to fit in these tasty treats.

All in all, this was a really successful night. We all had such a blast and all of the food was fantastic. If you can get your hands on this cookbook, I definitely would! Totally worth every cent.
http://www.annabel-langbein.com/books-and-reviews/annabel-langbein-a-free-range-life-summer-annual-2013/50/

And to finish off, here are a few pictures of friends enjoying their meal.


Saturday 2 November 2013

Parmesan Crusted Chicken Arrabbiata

The third and final installment of creating pasta recipes for my brother.

I tried to keep all three recipes as different as I could, without being too out there in terms of flavors and ingredients, as my brother can be very fussy.

Arrabbiata is my favorite pasta sauce. You can buy it in the pasta sauce section of the supermarket but it is very simple to make yourself too. Especially the recipe that I have here. And at least by making it yourself you can simply adjust it to suit your tastes.


I apologize about the picture quality! It gets a bit tricky with a phone camera at night!

Parmesan Crusted Chicken Arrabbiata


Serves 4

Chicken:

2 Medium chicken breasts, halved lengthways (or 4 small)
1 Cup lite Greek yogurt
1/2 Cup finely grated parmesan
1/2 Cup breadcrumbs
Salt and Pepper to season

Arrabbiata:

2 Tbsp Olive Oil
1 Onion, finely diced
2 cloves garlic, finely diced
3 small red chillis, deseeded and finely diced
1 Tbsp tomato paste
2 400 g cans diced tomatoes
1 1/2 Tbsp balsamic vinegar
1/2 Tbsp mixed herbs

1. Preheat oven to 200°C. Combine yogurt and parmesan and salt and pepper (if required, to taste) in a small bowl and bread crumbs in another.

2. Coat the chicken in the yogurt mixture, then the breadcrumbs. Place on a baking paper lined baking tray and bake for about 20 minutes, until the chicken is cooked through.  

3. Make the sauce while the chicken is cooking: Heat the oil in a large fry pan over a medium heat. Add onion and garlic and cook for about 3 minutes. Add chillis and tomato paste, cook for a further minute. Add tomatoes and herbs. Cook, stirring often, for 15 minutes until the sauce thickens. Stir in the vinegar and season with salt and pepper.

4. Serve chicken and sauce over pasta (I used Linguine). 

Nutritional Information:

Calories 401
Carbs    22 g
Fat        16 g
Protein   40 g
Fibre      1 g
Sodium  673 g 

Wednesday 30 October 2013

Banana Honey Muffins

I had some bananas that I needed to use as they had gone pretty black. I wanted to make something that was at least semi-decent nutrition wise, and I also wanted to just use ingredients that I already had in the pantry.

Banana honey muffins fitted with all these criteria, so here they are!


Banana Honey Muffins


Makes 14

2 Cups self raising flour
1 tsp baking powder
1 tsp ground cinnamon
1/4 tsp salt
1/2 Cup trim milk
2 Tbsp honey
1 tsp vanilla essence
2 eggs
1 medium bananas, mashed
1/4 Cup stevia
50 g apple sauce

1. Preheat oven to 180°C. Grease or line a muffin pan.

2.  Sift the flour, baking powder, cinnamon, stevia and salt into a large bowl. 

3. Combine the apple sauce, milk, honey, vanilla, eggs, and mashed banana in another bowl and whisk until well combined.

4. Make a well in the centre of the dry ingredients and add the wet ingredients. Stir until just combined. 

5. Spoon into the muffin pan and bake for 15 minutes, or until a skewer inserted into the centre of the muffins comes out clean. 

Nutritional Information:

Calories 102
Carbs     20 g
Fat         1 g
Protein   3 g
Fibre      1 g
Sodium   217 mg

Monday 28 October 2013

Coconut Pineapple Slice

When I was shopping for the ingredients for the pineapple cheesecake, the tin of pineapple was 2 for $2.99 so after making the cheesecake I still had a tin left over. I also have a lab morning tea tomorrow which I thought I better contribute to. These made a good basis for coming up with another recipe.

So I started with pineapple, decided that I wanted to make a slice, and pulled out a heap of different things from the pantry, chucked them all together and waited patiently to see how it turned out. It turned out lovely. The base is nice and spongy and the pineapple layer makes a great sweet topping.

I also made oatmeal buttercream pies! You can find the recipe for them here: http://www.kevinandamanda.com/recipes/dessert/oatmeal-buttercream-pies.html 


Coconut Pineapple Slice

Makes 18 pieces

432 g tin crushed pineapple in juice, drained
1/3 Cup pineapple juice (reserved from above)
150 g butter, softened
1/4 Cup caster sugar
1/4 Cup stevia
1 tsp vanilla essence
2 eggs
1 1/4 Cup self raising flour
2/3 Cup dessicated coconut plus extra for topping

1. Preheat oven to 180°C and line a slice pan with baking paper.

2. Beat together the butter, vanilla, sugar, and stevia until fluffy. Add the eggs one at a time and beat well after each addition. 

3. Add the flour, pineapple juice, and coconut and stir until combined. Spread into the slice pan. Top with the pineapple and sprinkle with extra coconut.

4. Bake for 35-40 minutes, or until a skewer comes out clean. Cool in the pan before cutting into 18 pieces. 

Nutritional Information:

Calories 159
Carbs     15 g
Fat         10 g
Protein    2 g
Fibre      1 g
Sodium   140 mg

Saturday 26 October 2013

Pineapple Cheesecake

My boyfriend and I love pineapple and love cheesecake so I thought why not try a pineapple cheesecake? I don't even know what to say about it, I think the pictures speak for themselves!

One thing I will say, this cheesecake turned out to be quite nice and light which makes a change from most cheesecakes which are very heavy. I liked this! However, I can see it being dangerous as it means you could probably eat a heap more of this than a regular cheesecake.

Cheesecakes are seriously easy to make, so why not give this one a go!


Pineapple Cheesecake


Serves 12

350 g shortbread cookies
100 g butter, softened
250 g lite cream cheese
1/2 Cup icing sugar
1 1/2 Cups cream, whipped
432 g tin crushed pineapple, drained and juice reserved
3 Tbsp pineapple juice
Pineapple lumps to decorate (If you can get them!)

1. Process the cookies to a crumb in a food processor. Add the butter and combine well. Press into the base of a springform cake tin lined with baking paper. Refrigerate while making the filling.

2. Beat the cream cheese, icing sugar, and pineapple juice until thick and creamy. Mix in the crushed pineapple and fold in the whipped cream with a wooden spoon.

3. Spread over the base and chill until set. Before serving, crush or roughly chop the pineapple lumps and sprinkle them over top.

Nutritional Information:

Calories 360
Carbs    25 g
Fat        28 g
Protein  3 g
Sodium  195 mg


Quinoa and Chia Granola (Muesli)

I ran out of my toasted tropical muesli and decided that I wanted to try something a bit more out there so I had the idea of adding uncooked quinoa and chia seeds to the oat mix before toasting. It turned out delicious!

I was going to add almonds as well, but I forgot to pick some up at the store so I just went without but I feel that they would be a tasty addition if you are going to try this recipe for yourself.


Quinoa and Chia Granola

Makes approx 12 half cup servings

3/4 Cup quinoa, rinsed
2 1/2 Cups rolled oats
1/4 Cup chia seeds
1/2 Cup shredded coconut
1/2 Cup sunflower seeds
1/2 Cup pumpkin seeds
3 Tbsp canola oil
1/3 Cup honey
1 tsp vanilla essence
2/3 Cup dried fruit (I used apricot and pineapple)

1. Preheat oven to 200°C. 

2. Combine canola oil, honey, and vanilla essence in a small bowl.

3. Combine quinoa, oats, chia seeds, coconut, sunflower seeds, and pumpkin seeds in a large bowl. Add the honey mixture and combine well, making sure all of the oats are coated. 

4. Spread the mixture onto a baking tray and bake for about 30 minutes, until the oats are golden Stir every 5-10 minutes.

5. Mix in the dried fruit and cool completely before storing in a airtight container.

Serve with milk, yogurt, or both. I had mine with berry yogurt and it was great!

Nutritional Information

Calories 273
Carbs    34 g
Fat        13 g
Protein   8 g
Fibre      6 g
Sodium  17 mg


Saturday 19 October 2013

Indivdiual Raspberry Tarts

Pastry recipes can seem a bit daunting sometimes, especially if you aren't an experienced baker so I wanted to create a simple pastry recipe for you guys.

As long as you have a food processor, the base for these tarts only takes a couple of minutes to make. By chilling the base for a while before adding the filling and baking, I didn't see the need to blind bake the pastry first, again making things a lot easier.

I am really happy with how these turned out. I was so nervous about whether I had the consistency right to allow them to set while cooking. Then I was also nervous that they would be really difficult to get out of the pan. Both of my worries turned out to be unnecessary!


Individual Raspberry Tarts

Makes 10

Base:

125 g butter, softened
1 Cup flour
1/2 Cup icing sugar
2 tsp vanilla essence

Filling:

1 Cup caster sugar
1 1/2 Cups raspberries (fresh or frozen)
3 Tbsp custard powder
1/2 tsp baking powder
3 eggs
2 tsp vanilla essence

1. Make the base by placing all of the base ingredients into a food processor and running until the pastry forms a clump around the blade. With floured hands, divide the pastry into 12 portions and press into the base and up the sides of a greased 12-hole muffin tin. Refrigerate for at least 30 minutes.

2. Preheat oven to 180°C. Place the raspberries and 1 Tbsp water into a saucepan and bring to a simmer to liquify the raspberries. Pass through a strainer to remove the seeds.

3. Place all the filling ingredients into the food processor bowl (wipe it clean first!) and combine. Pour over the chilled bases and bake for 15 minutes, until the filling is set. Leave to cool in the tin before gently removing.

4. Dust with icing sugar before serving.  

Grilled Steak Risoni

My brother asked me to create a recipe for a new pasta dish. I couldn't decide exactly what I wanted to do, so I wrote three completely different recipes. Here is the first installment.

In case you haven't encountered risoni before, it is a small rice shaped pasta. It is often included in soups but it also a great pasta to use in pasta salads and all sorts of dishes.

I love cooking risoni (and rice) the way I have done here, in the veges, stock and tomatoes. The pasta absorbs all the flavors as it cooks giving you pasta that is just bursting with deliciousness.


Grilled Steak Risoni


Serves 4

500 g Steak
1 1/4 Cups risoni
1 onion, diced
3 cloves garlic, finely diced or crushed
1 red chilli, deseeded and finely diced
2 Cups beef stock
400 g can crushed tomatoes
1/3 Cup Tomato Paste
1/2 Cup chopped flat leaf parsley
Salt and Pepper to season

1. Heat a dash of oil in a medium saucepan. Add onion and garlic and cook for about 3 minutes. Add the chilli and cook for a further minute. Add the risoni and combine well.  Add the stock, tomatoes, and tomato paste. Bring to a gentle boil, cover, and simmer for about 25 minutes, until pasta is tender and liquid absorbed. Stir it a few times during cooking so that the pasta doesn't stick to the bottom of the pan.

2. While the pasta is cooking, prepare the steak. Heat oil in a fry pan. Season the steak with salt and pepper and cook for a few minutes each side, until medium rare. Let the steak rest for about ten minutes before cutting into thin slices.

3. Stir the parsley into the pasta. Serve the steak over the pasta.

Nutritional Information

Calories 319
Carbs    33 g
Fat        6 g
Protein  34 g
Fibre     2 g
Sodium  754 mg

Monday 14 October 2013

Sesame Chicken Noodles

I had left over chicken from lasts nights roast dinner, also wasn't really in the mood to make anything too time consuming so I thought "what's the quickest thing I can make?" Noodles.

As long as you have a good quality noodle it's simple to create a quick, easy, and tasty meal.

I used sesame oil and Chinese rice wine here. Both of these are really strong flavors so be really careful to not go overboard with them!


Sesame Chicken Noodles


Serves 2

2 cakes dry egg noodles
200 g cooked and shredded chicken
1 red capsicum, diced
1 carrot, diced
3-4 cloves of garlic, crushed or diced
1/2 Cup chilli sauce
1 Tbsp sesame oil
2 Tbsp reduced salt soy sauce
1 Tbsp Chinese rice wine
sesame seeds for garnish


1. Place the noodles in a saucepan of boiling water, cover, and simmer. Heat a bit of oil in a fry pan or wok

2. Mix the garlic, chilli sauce, sesame oil, soy sauce, and Chinese rice wine in a small bowl.

3. Stir fry the capsicum, carrot, sauce, and chicken for a few minutes. Drain the noodles and add these to the pan/wok. Stir or toss to combine and heat through.

4. Sprinkle with some sesame seeds before serving.


Wednesday 9 October 2013

Low Fat Butter Chicken

It's not uncommon for me to absolutely crave butter chicken. But with a combination of not wanting to walk to the Indian takeaways and feeling the need to create something healthy I came up with this reduced fat butter chicken and I must say, it tastes pretty good!

I think the key to making a good butter chicken is the right balance of spices, I think this recipe accomplishes that nicely.


Low Fat Butter Chicken


Serves 4

1/2 tsp each of ground spices: ginger, chilli, turmeric, cinnamon, garam masala, salt
450 g skinless chicken breast, cubed
25 g reduced fat spread (or coconut oil, or butter)
1 onion, finely diced
4 cloves of garlic, crushed or finely diced
3 - 4 Tbsp tomato paste
1 Cup light and creamy evaporated milk

1. Combine all the spices in a small bowl, add the chicken and toss to coat.

2. Heat the spread over a medium heat in a fry pan, add the onion and garlic and cook for about 2 or 3 minutes. Add the chicken and cook for a further 5 minutes (smells amazing at this point!)

3. Add the evaporated milk and tomato paste, combine well and cook for another 5 minutes.

4. Serve over rice.


Nutritional Information

Calories 237
Carbs    14 g
Fat         5 g
Protein   33 g

Tuesday 8 October 2013

Tropical Toasted Muesli

Muesli is my fav. Unfortunately, it can be SO hard to find a decent muesli in the supermarket so I just figure that it's easier to make my own.

Making your own muesli doesn't take much effort at all. It's quick and easy!

I love this combination of dried tropical fruits (pineapple, a couple of melons, and mango), almonds, coconut, and vanilla.

Tropical Toasted Muesli


Makes 12 half-cup servings


3 Cups rolled oats
1 Cup shredded coconut
70 g sliced almonds
1/4 Cup canola oil
1/3 Cup maple syrup
1 tsp vanilla essence
1 Cup chopped dried mixed tropical fruits

1. Preheat the oven to 160°C

2. Combine the oats, coconut, and almonds in a large bowl.

3. Heat the oil, maple syrup, and vanilla over a medium heat in a saucepan, whisking frequently, until just hot (about 3 minutes). Pour over the oat mixture and mix well, make sure all the oats are coated.

4. Spread the mixture evenly over a baking tray with sides or roasting dish and bake for about 25 minutes, stirring ever 5 minutes, until the oats are lightly golden. 

5. Stir in the dried fruits and leave to cool completely before transferring to an airtight container. It will keep for a week or two.

Nutritional Information

Calories 250
Carbs    33.3 g
Fat        13.1 g
Protein   4.9 g
Fibre     3.4 g


Milo Chocolate Cookies

Today a friend gave me a challenge: bake something with Milo. I made cookies. Here's hoping that she likes them!

I used stevia, a natural sweetener from the Stevia plant, to replace most of the sugar. Stevia is A LOT sweeter than sugar so you only need to use a small amount. If I was using sugar, I would have used about 3/4 Cup, but I only used 2 Tbsp Stevia. If you are using this sweetner don't go overboard with it... too much will be far too sweet and also leave a weird aftertaste. 


Milo Chocolate Cookies


Makes 32

160 g apple sauce
2 Tbsp Stevia
1 Tbsp brown sugar
1 egg, lightly beaten
1 1/2 Cup self raising flour
1 1/2 Cup Milo
150 g dark chocolate drops

1. Preheat oven to 180°C and line a couple of baking trays with baking paper.

2. Sift the flour into a large mixing bowl, add the stevia, brown sugar and Milo. Mix to combine. Add the apple sauce and egg and combine well. Add the chocolate drops and mix again.

3. Spoon teaspoonful amounts of the mixture onto the baking trays and bake for about 15 minutes.

4. Cool cookies on a wire rack and store in an airtight container.

Nutritional Information

Calories 59
Carbs    10 g
Fat        2 g
Protein  1 g

Saturday 5 October 2013

Blueberry and Lemon Curd Muffins

There is a cafe near the lab that has the most amazing blueberry lemon muffins, but as with any cafe brought muffin they are really expensive and absolutely loaded with sugar. So I decided to try and write a healthier version of  this muffin flavour and this is what I came up with, no sugar and no butter but full of flavour.

My friends got stuck right in almost as soon as they came out of the oven and their comments were very positive. I waited until after they had eaten their muffins to tell them that there was no sugar or butter and they said they would have never guessed and that it tasted better than most muffins they have brought in stores.

My boyfriend doesn't like blueberries so I set aside a quarter of the batter before adding blueberries and added raspberries to his instead. They look like they turned out well! Once he has tasted them I will let you know how that combination turned out.

Blueberry Lemon Curd Muffins


Makes 12


2 Cups self raising flour
1/4 Cup Stevia (or 1 Cup of sugar if you want)
1 egg
1/4 Cup apple sauce
1 1/4 Cup skim milk
1 tsp grated lemon rind
2 tsp lemon juice
1 1/4 Cup blueberries (fresh or frozen, if using frozen they don't need to be thawed)
12 tsp lemon curd

1. Preheat oven to 200°C and grease or line a 12 hole muffin tin

2. Mix all the ingredients except the lemon curd in a large bowl until just combined.

3. Place about a tablespoon full of mixture into each hole of the tin, add 1 tsp of lemon curd per hole:


4. Cover the lemon curd with the remaining batter and bake for about 15 minutes.

Nutritional Information

Calories 98
Carbs    18 g
Fat         1 g
Protein   3 g

Wednesday 2 October 2013

Two Minute Chocolate Cake

Some of you have probably heard of "mug cakes." For those that haven't, the idea is simple: Chuck a few ingredients in a coffee mug, into the microwave and a minute or so later you have a single serve cake. basically the best idea ever.

Tonight just seemed to call for chocolate so I created this healthier version of a chocolate mug cake. Tastes great and definitely satisfies that chocolate craving.

And seriously... it literally takes two minutes from start to finish.


Two Minute Chocolate Cake


Serves One

1 Tbsp + 2 tsp cocoa powder
3 Tbsp plain flour
1/8 tsp salt
2 tsp sugar or stevia
1/4 tsp baking powder
3 tsp apple sauce
3 Tbsp milk
1/2 tsp vanilla essence

1. Mix the dry ingredients together in a small bowl, throughly.

2. Add the liquid ingredients and stir. Transfer the mixture to a ramekin, coffee cup, or some other kind of small dish.

3.  Microwave for 1 minute.

If you don't want to eat it straight out of the dish it was cooked in then spray the dish with a little oil before adding the cake mix.

Nutritional Information

Calories 137
Carbs    27 g
Fat        1 g
Protein  8 g

Saturday 28 September 2013

Italian Baked Chicken

I have had a bit of a craving for some sort of baked chicken for a while now. I usually do chicken breasts but I thought I would change it up a bit and use boneless, skinless thighs instead.

Very easy to make and it tasted pretty good too!

Sorry about the picture.. I forgot my camera so had to use my phone and it was pretty shadowy but I was impatient to eat!


 Italian Baked Chicken


Serves 4

about 500 g boneless chicken thighs (or a mixture of thighs and drumsticks)
1 Onion, diced
3 Cloves garlic, crushed and finely diced
12 white button mushrooms, sliced
1 Cup spinach (didn't actually measure it out, just grabbed a big handful)
400 g can of tomatoes
2 tsp dried mixed herbs
a handful of grated mozzarella
Italian Parsley for garnish
salt and pepper

1. Preheat oven to 220°C. Heat a fry pan and a bit of oil over a high heat.

2. Coat the chicken with a little bit of olive oil, salt, and pepper. Add the chicken to the hot pan and cook for about 5 minutes, turn and cook for a further 2 minutes (doesn't need to be cooked through, it will finish cooking in the oven). Remove chicken from the pan and set aside. 

3.  Add onion, garlic, and mushrooms to the pan and cook for about 5 minutes. Add the spinach to wilt (only about a minute, or less). Add the tomatoes and mixed herbs and combine.

4.  Place chicken and vegetables in a casserole dish, sprinkle with mozzarella and bake for about 20 minutes, until nice and golden and chicken cooked through.

5. Serve chicken over pasta (or rice, or with a garden salad and garlic bread, however you like!).

Nutritional Informatin

Calories 336
Carbs    19 g
Fat        16 g
Protein   33 g
Fibre      2 g